순서
1. pom.xml
- 파일업로드 라이브러리
- mvnrepository 에 가서 commons-fileUpload, imgscalr 검색 후 복사하여 pom.xml 에 붙여넣기
2. web.xml
- 구글에 web.xml web-app 3.1 검색 후 아래 내용 붙여넣기
<web-app xmlns="http://xmlns.jcp.org/xml/ns/javaee" xmlns:xsi="http://www.w3.org/2001/XMLSchema-instance"
xsi:schemaLocation="http://xmlns.jcp.org/xml/ns/javaee http://xmlns.jcp.org/xml/ns/javaee/web-app_3_1.xsd"
version="3.1">
- 파일 업로드 설정
3. servlet-context.xml 에서 multipartResolver추가
4. web.xml 에서 location에 C:\upload 입력
5. Servers 에 context.xml
6. views에 upload 폴더 생성 후 uploadForm.jsp생성
7. src/main/java 에 uploadController 생성
8. views에 upload 폴더에 uploadSuccess.jsp생성
9. webapp - resources 에 upload 폴더 생성
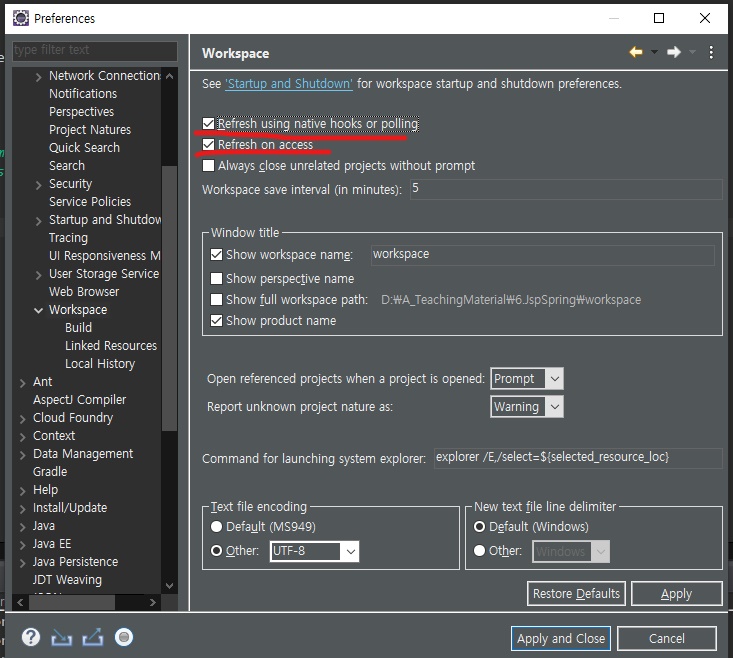
* 파일 업로드 됐을 때, 이미지 보이기 까지 시간이 조금걸림
해결 방법 : window - preferences - General - workspace 에서 두 가지 체크
10. views에 upload 폴더에 uploadAjax.jsp 생성
11. webapp - resources 에 js 폴더 생성 후, jquery-3.6.0.js 삽입
<script type="text/javascript" src="/resources/js/jquery-3.6.0.js"></script>
'개발자 > JspSpring' 카테고리의 다른 글
| 20220210 썸네일 (0) | 2022.02.10 |
|---|---|
| 20220210 @ResponseBody (0) | 2022.02.10 |
| 20220210 입력값 검증(validate) (0) | 2022.02.10 |
| 20220208 페이징 (0) | 2022.02.08 |
| 20220208 view 만들기 (0) | 2022.02.08 |